Table of Contents
Why You Should Not Ignore the Check Light
- •Damage spreads and repair bills climb
- •Poor fuel economy and power persist
- •Risk of failing emissions inspection
- •Pinpoint the cause, minimal repair
- •Fuel economy and power restored
- •Pass emissions with confidence
When the engine check light turns on, it signals that the vehicle's on-board computer has detected a problem that could affect performance, fuel economy, or emissions. A lit light is not just a cosmetic warning; it means the engine control unit (ECU) has logged a fault code. Ignoring it can lead to more serious damage, higher repair costs, and a potential failure to pass emissions inspection.
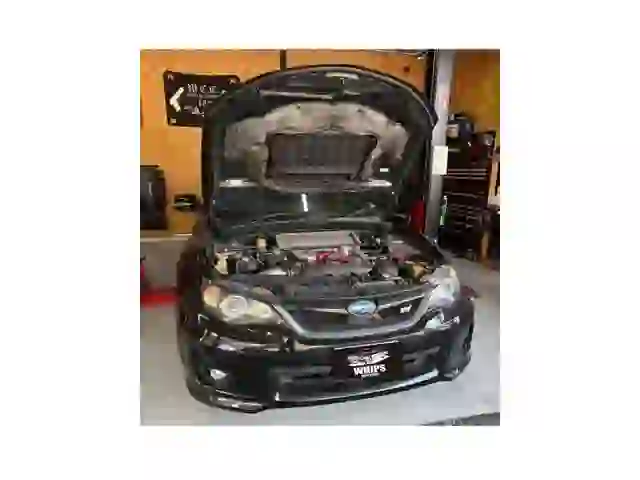
For owners of models like the Subaru Impreza, one of the most common culprits behind a persistent check light is a malfunctioning oxygen sensor (O2 sensor), which plays a key role in the combustion process. Confirming the cause early is the fastest way to keep damage and cost to a minimum.
What Usually Triggers the Light
- •Sudden drop in fuel efficiency
- •Rough idle and reduced power
- •Noticeable change in engine sound
- •Loose or damaged exhaust pipe
- •Faulty catalytic converter
- •Vacuum leak
While there are dozens of potential reasons for a check light, the oxygen (O2) sensor is a frequent offender. A failing sensor can cause the ECU to misjudge the air-fuel ratio, leading to rough idling, reduced power, and increased fuel consumption.
Other common triggers include a loose or damaged exhaust pipe, a faulty catalytic converter, or a vacuum leak. However, symptoms such as a sudden drop in fuel efficiency or a noticeable change in engine sound often point directly to the sensor's health. A similar case is when a bad cam angle sensor lights the check lamp, so isolating the fault by code is essential.
Using an OBD-II Scanner to Pinpoint the Problem
The first step in any repair is diagnosis. Plugging an OBD-II scanner into the vehicle's diagnostic port reveals the specific trouble code the ECU has stored. A code such as P0135 or P0136 typically indicates a low or high voltage reading from the upstream or downstream O2 sensor, respectively.
Once the code is identified, the mechanic can confirm the sensor is the source of the issue by checking its wiring, connector, and physical condition. This targeted approach saves time and prevents unnecessary part replacements. For the basics of reading codes, see how to read fault codes with OBD2.
Understanding the Oxygen Sensor's Role
- •Near the intake manifold (by the throttle body)
- •Feeds the fuel-injection map
- •Trims the mixture toward ~14.7:1
- •Sits after the catalytic converter
- •Monitors converter performance
- •Checks the state of the exhaust
Oxygen sensors sit in the exhaust stream, measuring the amount of oxygen in the gases that exit the engine. The ECU uses this data to adjust the fuel-injection map, keeping the mixture close to the ideal 14.7:1 ratio. In a Subaru Impreza, the upstream sensor is located near the intake manifold, while the downstream sensor sits after the catalytic converter.
- •Sends a clean, steady voltage signal
- •Corrects the mixture accurately
- •Keeps fuel economy and power
- •Erratic or wrong signal
- •ECU misjudges the air-fuel ratio
- •Check light on, efficiency drops
A healthy sensor provides a clean voltage signal; a faulty one can send erratic signals that trigger the check light and compromise engine efficiency. Because signal quality feeds directly into fuel economy and power, the sensor's health shapes how the whole engine runs.
Step by Step: Replacing the O2 Sensor
Here is the overall flow. On most Impreza models, the upstream O2 sensor is mounted on the intake manifold, close to the throttle body. Disconnect the battery to avoid electrical shock, then loosen the mounting bolt with a socket wrench and carefully pull the sensor out, noting the orientation of the connector. Inspect it for corrosion or damage, install the new sensor by aligning the connector and tightening the bolt to the manufacturer's torque specification, and reconnect the battery. Finally, verify that the wiring is intact and the connector is seated properly.
- •Torque the bolt to spec
- •Match the connector orientation
- •Disconnect the battery first
- •Over- or under-tightening
- •Mis-seating the connector
- •Pinching or breaking wires
Over- or under-tightening, mis-seating the connector, or pinching the wires can cause the light to return or the engine to run rough. Getting the orientation and torque right is the key to a reliable job.
Resetting the ECU and Verifying Success
After the new sensor is installed, the ECU may still hold the old fault code. Use the OBD-II scanner to clear the codes, then run the engine for a few minutes to let the ECU relearn the sensor's baseline. A successful replacement will turn the check light off and let the engine run smoothly.
It is a good idea to monitor fuel economy and engine performance over the next few days; any lingering issues should prompt a re-inspection of the sensor or a deeper diagnostic run.
Key Takeaways
When the check light comes on, read the code (such as P0135 or P0136) with an OBD-II scanner first, then decide whether the O2 sensor or another fault is to blame. If the sensor is the cause, replace it correctly with the right orientation and torque, clear the codes, and confirm the light stays off. Following the order of diagnose, isolate, replace, and verify restores fuel economy and power while avoiding needless repair costs and inspection risk.